Before you start, prepare your document in an external tool like Word or Google Docs and export it as a PDF. Once uploaded to Hubflo, fields are detected and placed automatically, you just review and adjust as needed.
To get started, go to Smartdocs in the left sidebar:
Click New Smartdoc.
Upload your document.
Fields are detected and placed automatically when you upload your PDF.
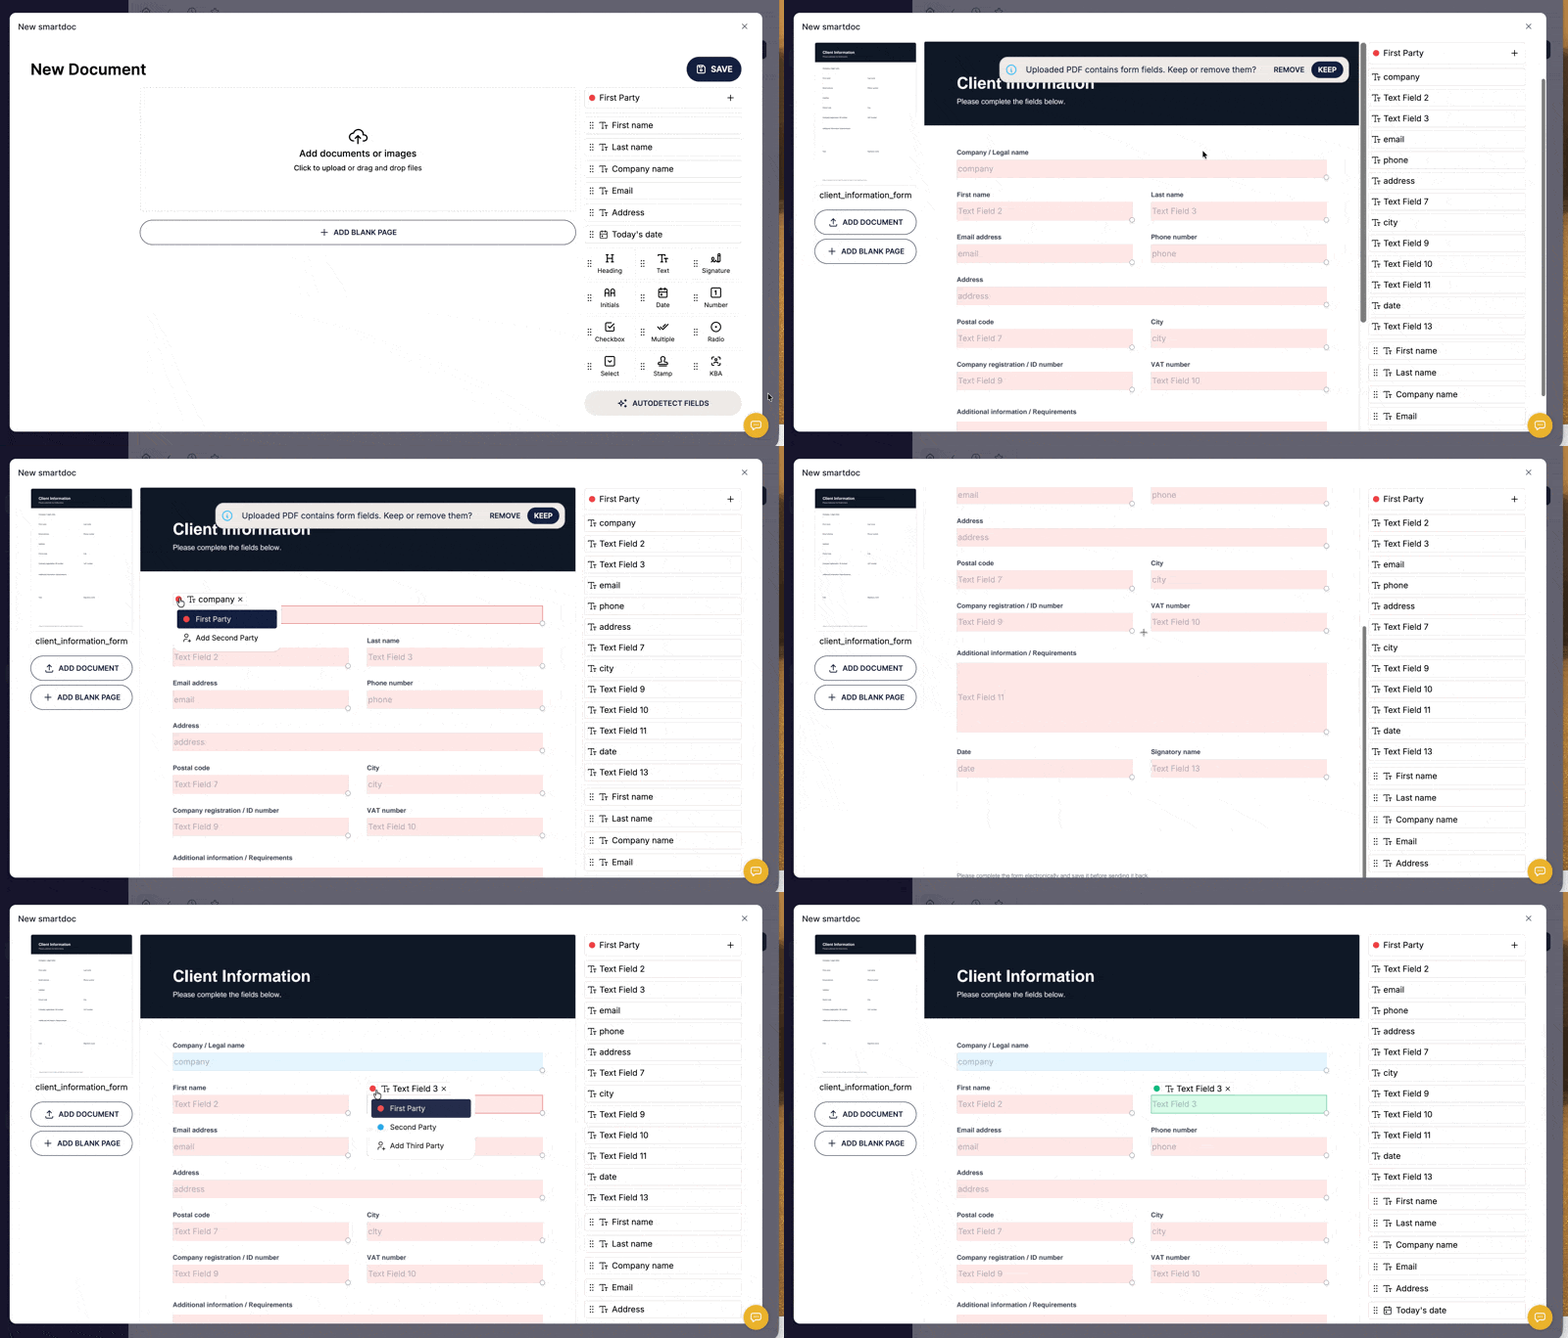
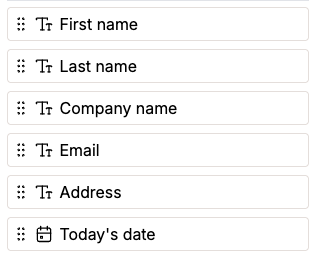
Once fields are placed, review them and adjust as needed, drag any additional fields from the right-hand panel, or move, resize, or remove ones Hubflo placed.

Fields include the basics like name, address, email, date, signature, and initials, checkboxes, radio buttons, and heading labels for section titles.
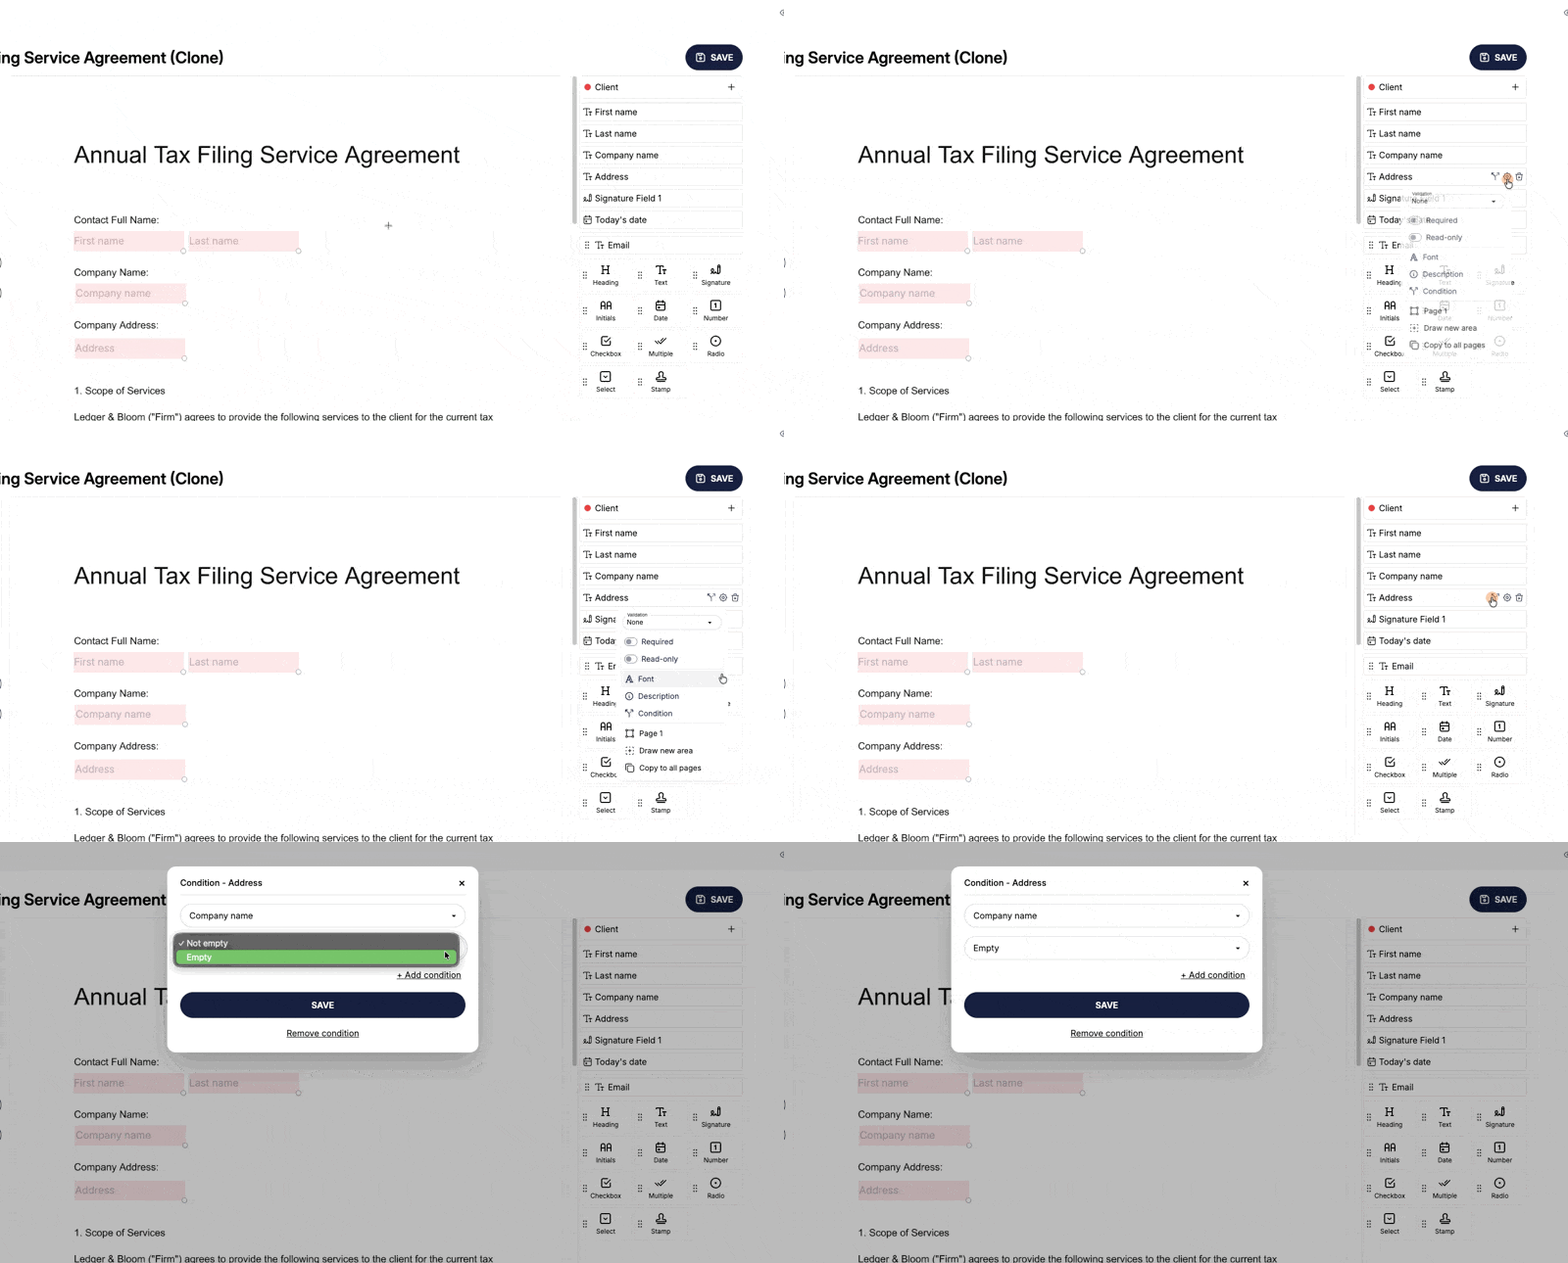
Hover over any field to open its settings. From there you can make it required, add placeholder text, set conditions, change the font, or copy it so it shows on all pages of the document.
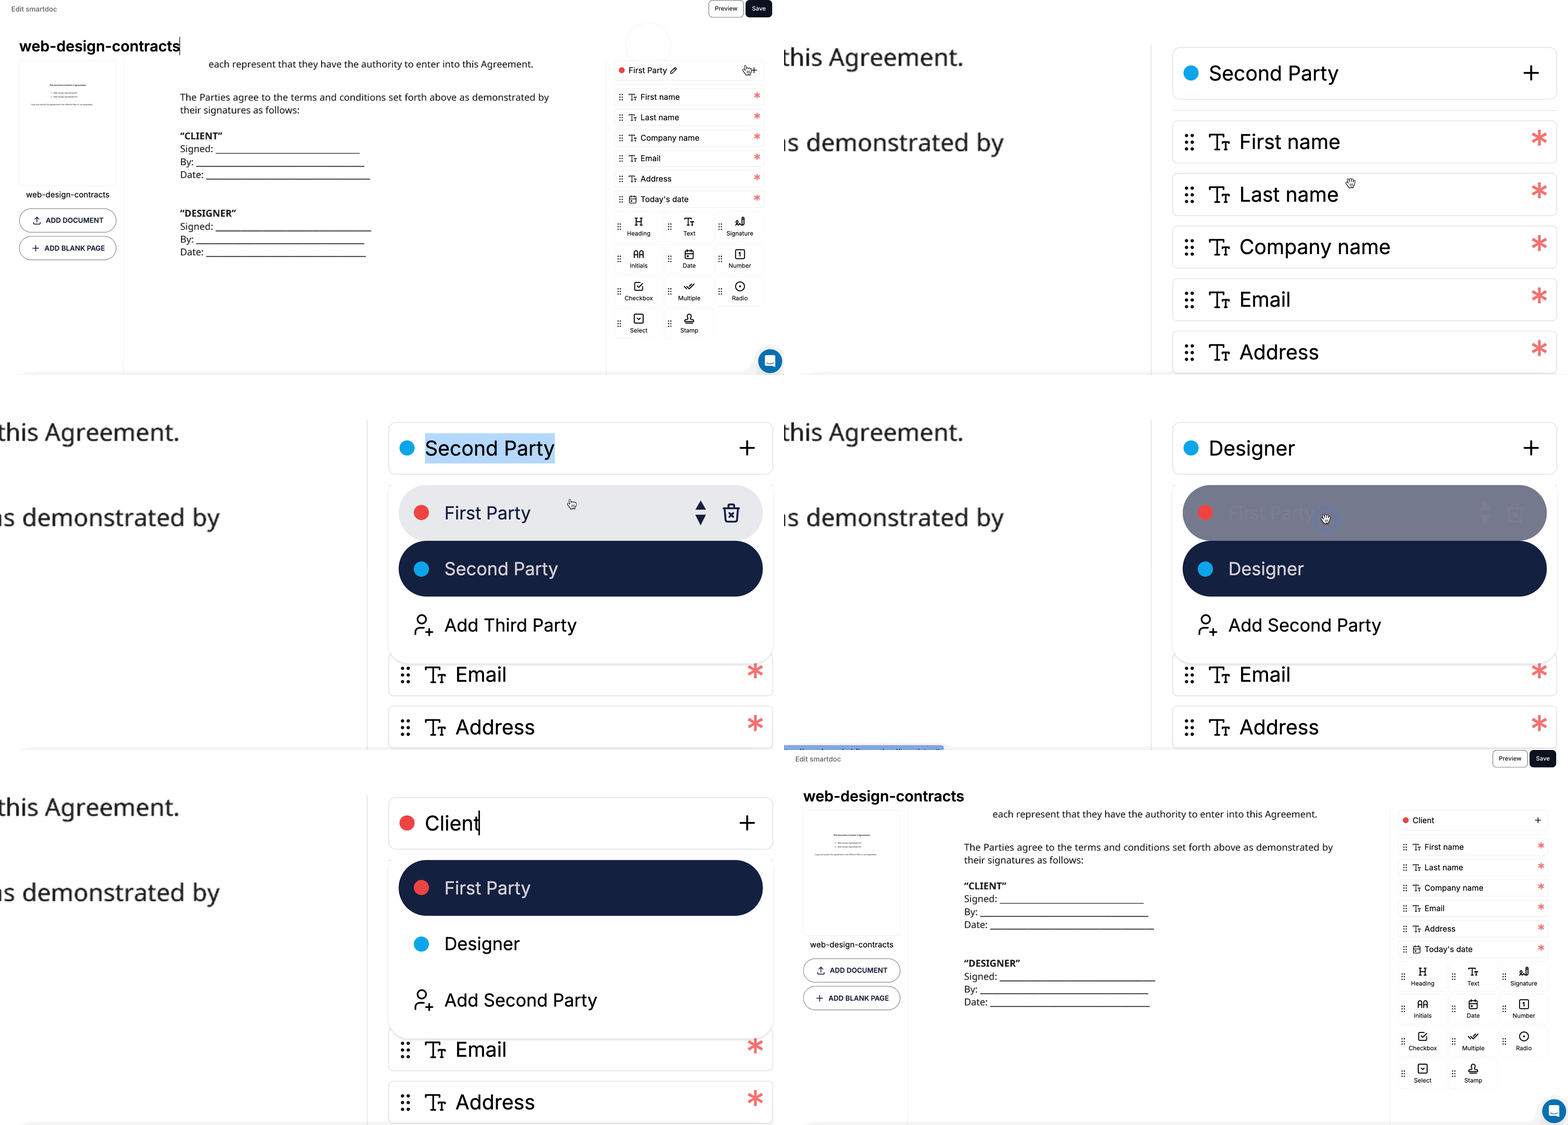
If more than one person needs to sign the document, click First Party + in the field panel to add another signer.
You can add as many parties as needed. Once you've added a party, assign the relevant fields to each one.
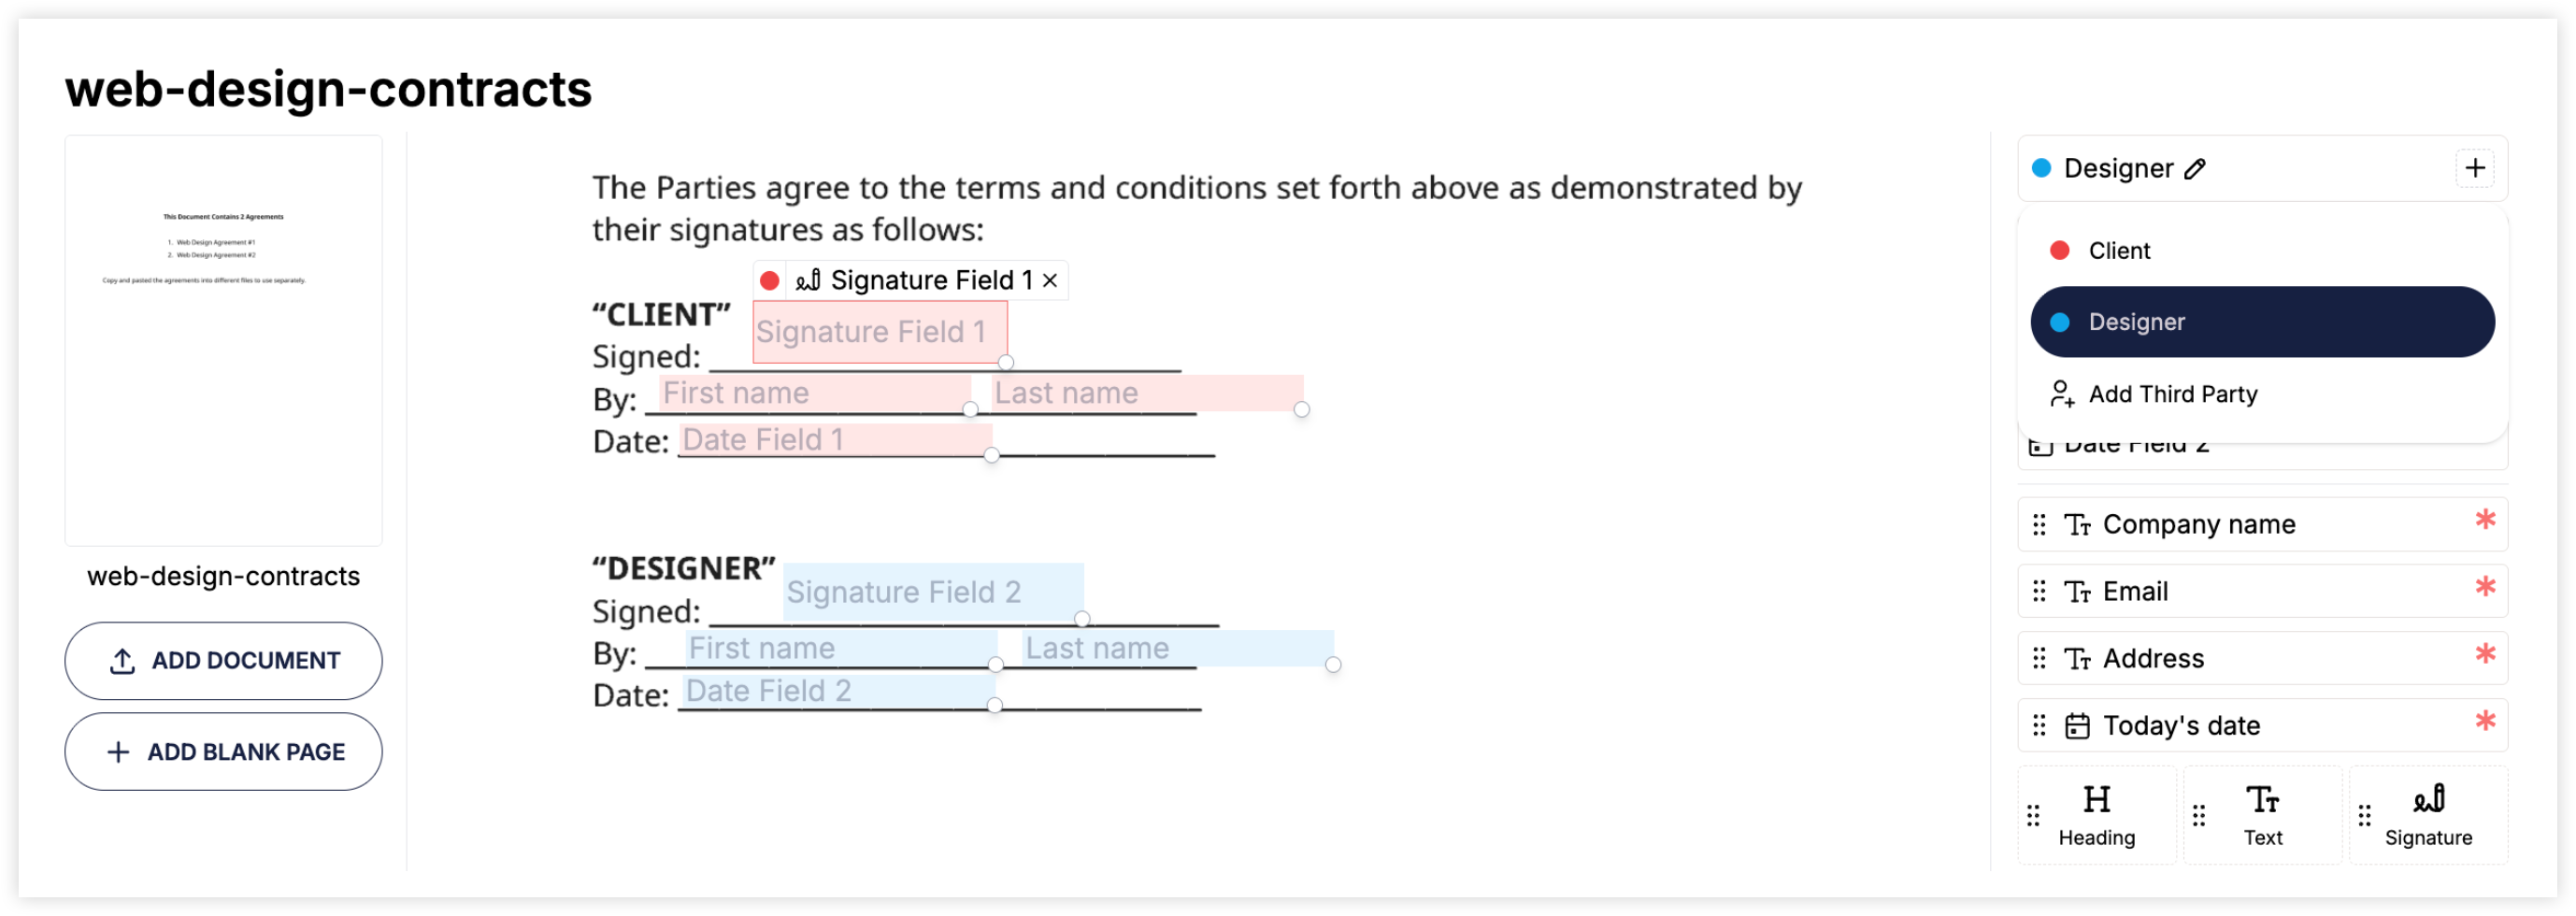
Once you've added your parties, you can also require them to sign in sequence rather than all at once, see Sending to multiple parties for how to turn that on.
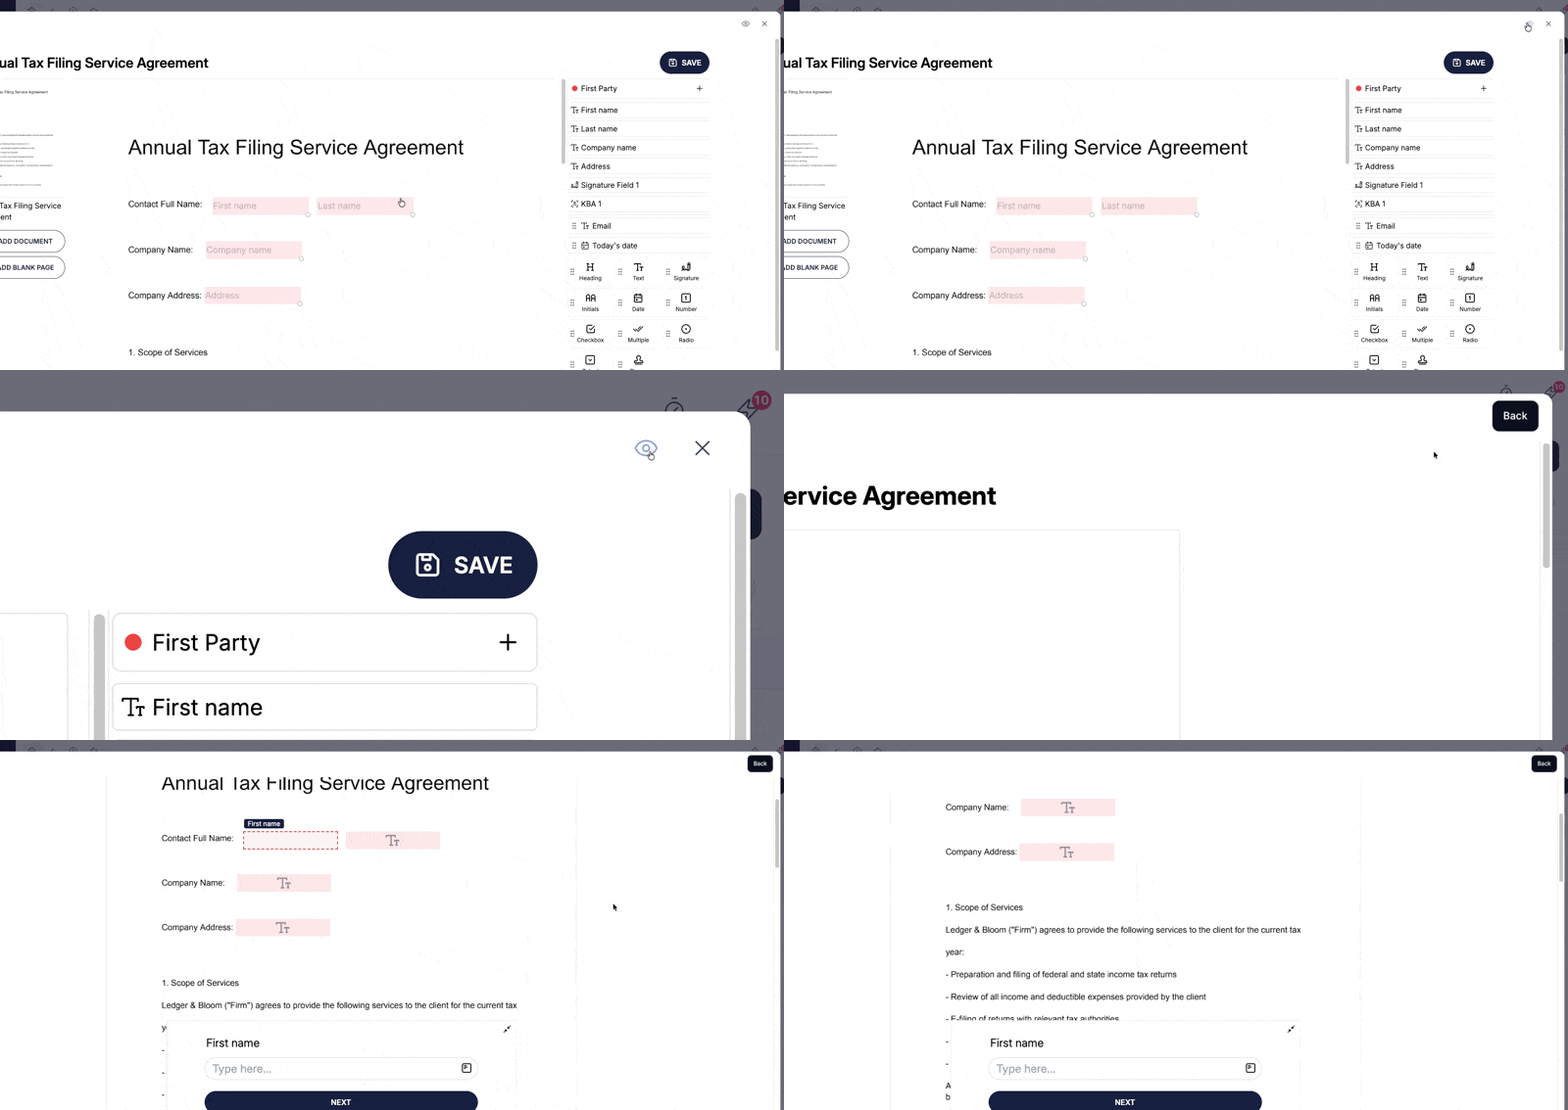
Click the eye icon in the top right to preview the Smartdoc exactly as your client will see it. When you're happy with it, click Save.

After saving, you can connect your Smartdoc fields to Hubflo CRM attributes so that when a client fills out and submits the Smartdoc, their profile is automatically updated with that information.
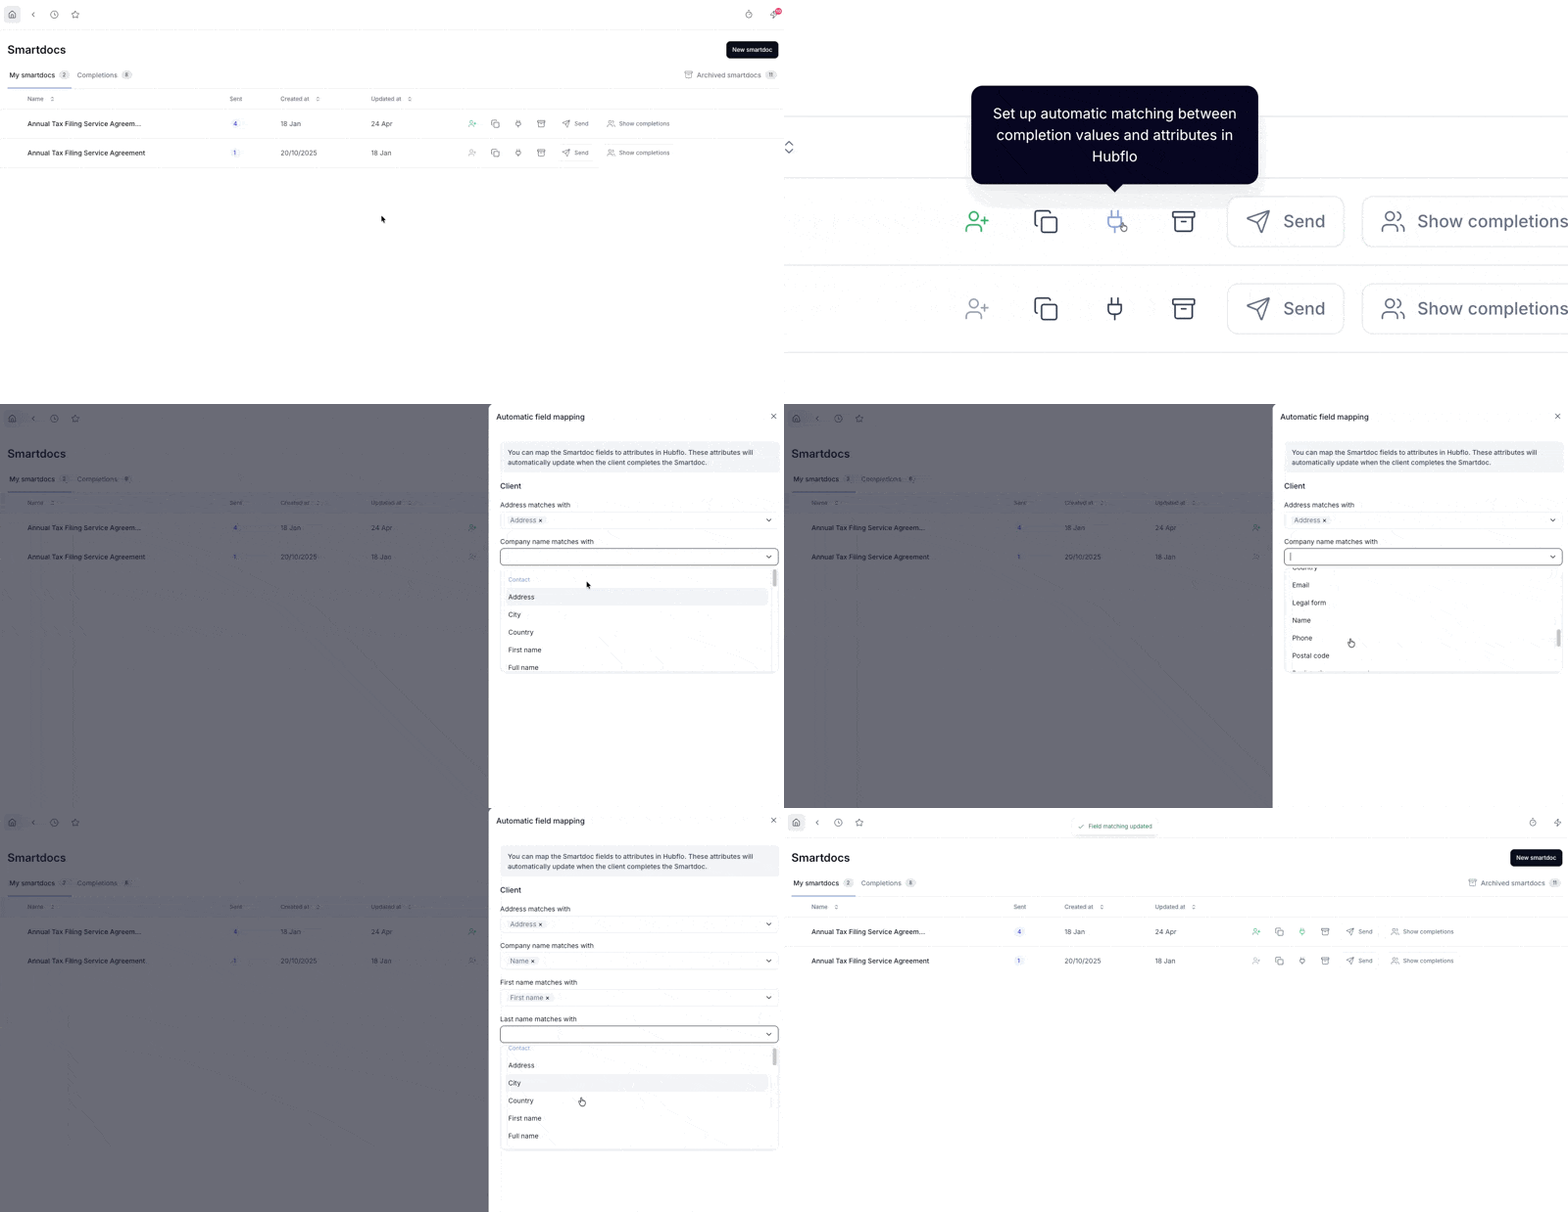
From the Smartdocs list, click the plug icon (🔌) next to your Smartdoc.
In the mapping panel, match each field to its corresponding CRM attribute, for example, link the First Name field to the First Name attribute.
Save your mapping.