
When setting up your Client Portal on Hubflo, you'll see the option to use either a custom domain or a Hubflo subdomain. This guide walks you through how to connect your IONOS domain in a few quick steps.
What you’ll need before you start
A registered IONOS domain (e.g. yourdomain.com)
An active Hubflo subdomain (e.g. yourcompany.hubflo.com)
Hubflo Plus Plan
Add your custom domain in Hubflo
In Hubflo, go to Settings → General Settings/Domain
Click Edit domain
Enter your custom domain (e.g.
portal.yourdomain.com) in the Custom domain field and click Next
Add a CNAME record in IONOS
Log in to your IONOS account
Navigate to the Domains section
Next to your domain, click the gear icon (⚙️) and choose Manage Subdomains
Click + Add Record
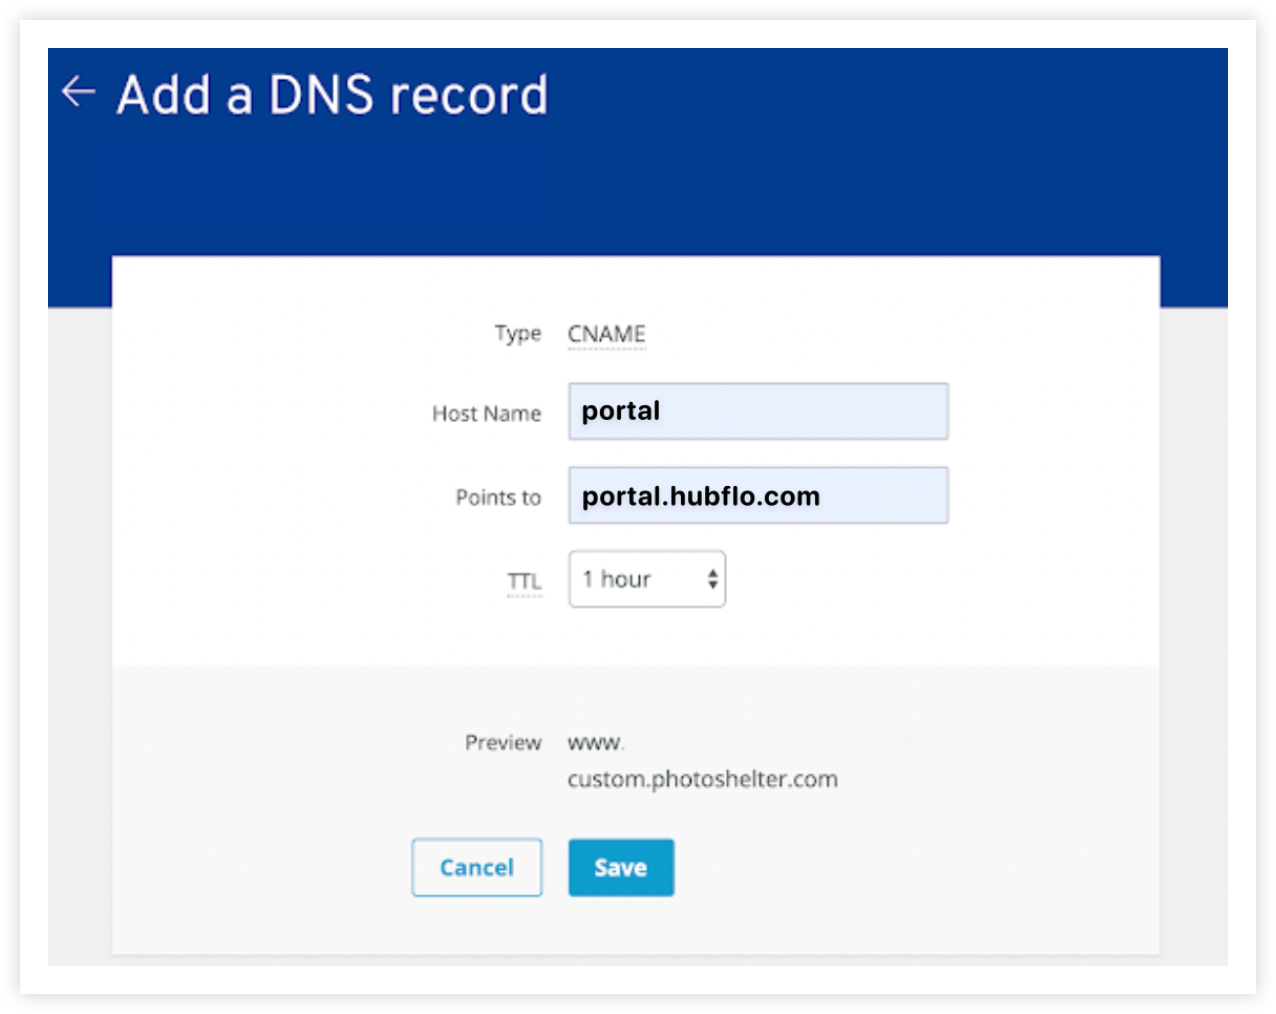
Select CNAME from the record type options
Fill in the fields as follows:
Host Name:
portal,client,www, etc. (depending on the subdomain you want to use—e.g.,portal.yourdomain.com)Target:
portal.hubflo.com← make sure this is exact and not changedTTL:
You can leave this as automatic
Click Save, then confirm the change on the next screen
Note: Your changes are effective immediately in IONOS. However, it can take up to an hour for the changes to fully propagate.