A template is the repeatable process blueprint you build once and reuse for every client who goes through the same workflow.
To create a new template, go to Flows in your navigation bar and click New template.
Prefer to see how it works? Follow our step-by-step interactive demo below to watch how a template is created, configured, and launched:
The template builder is divided into three core sections: Welcome Screen, Roles, and Steps.
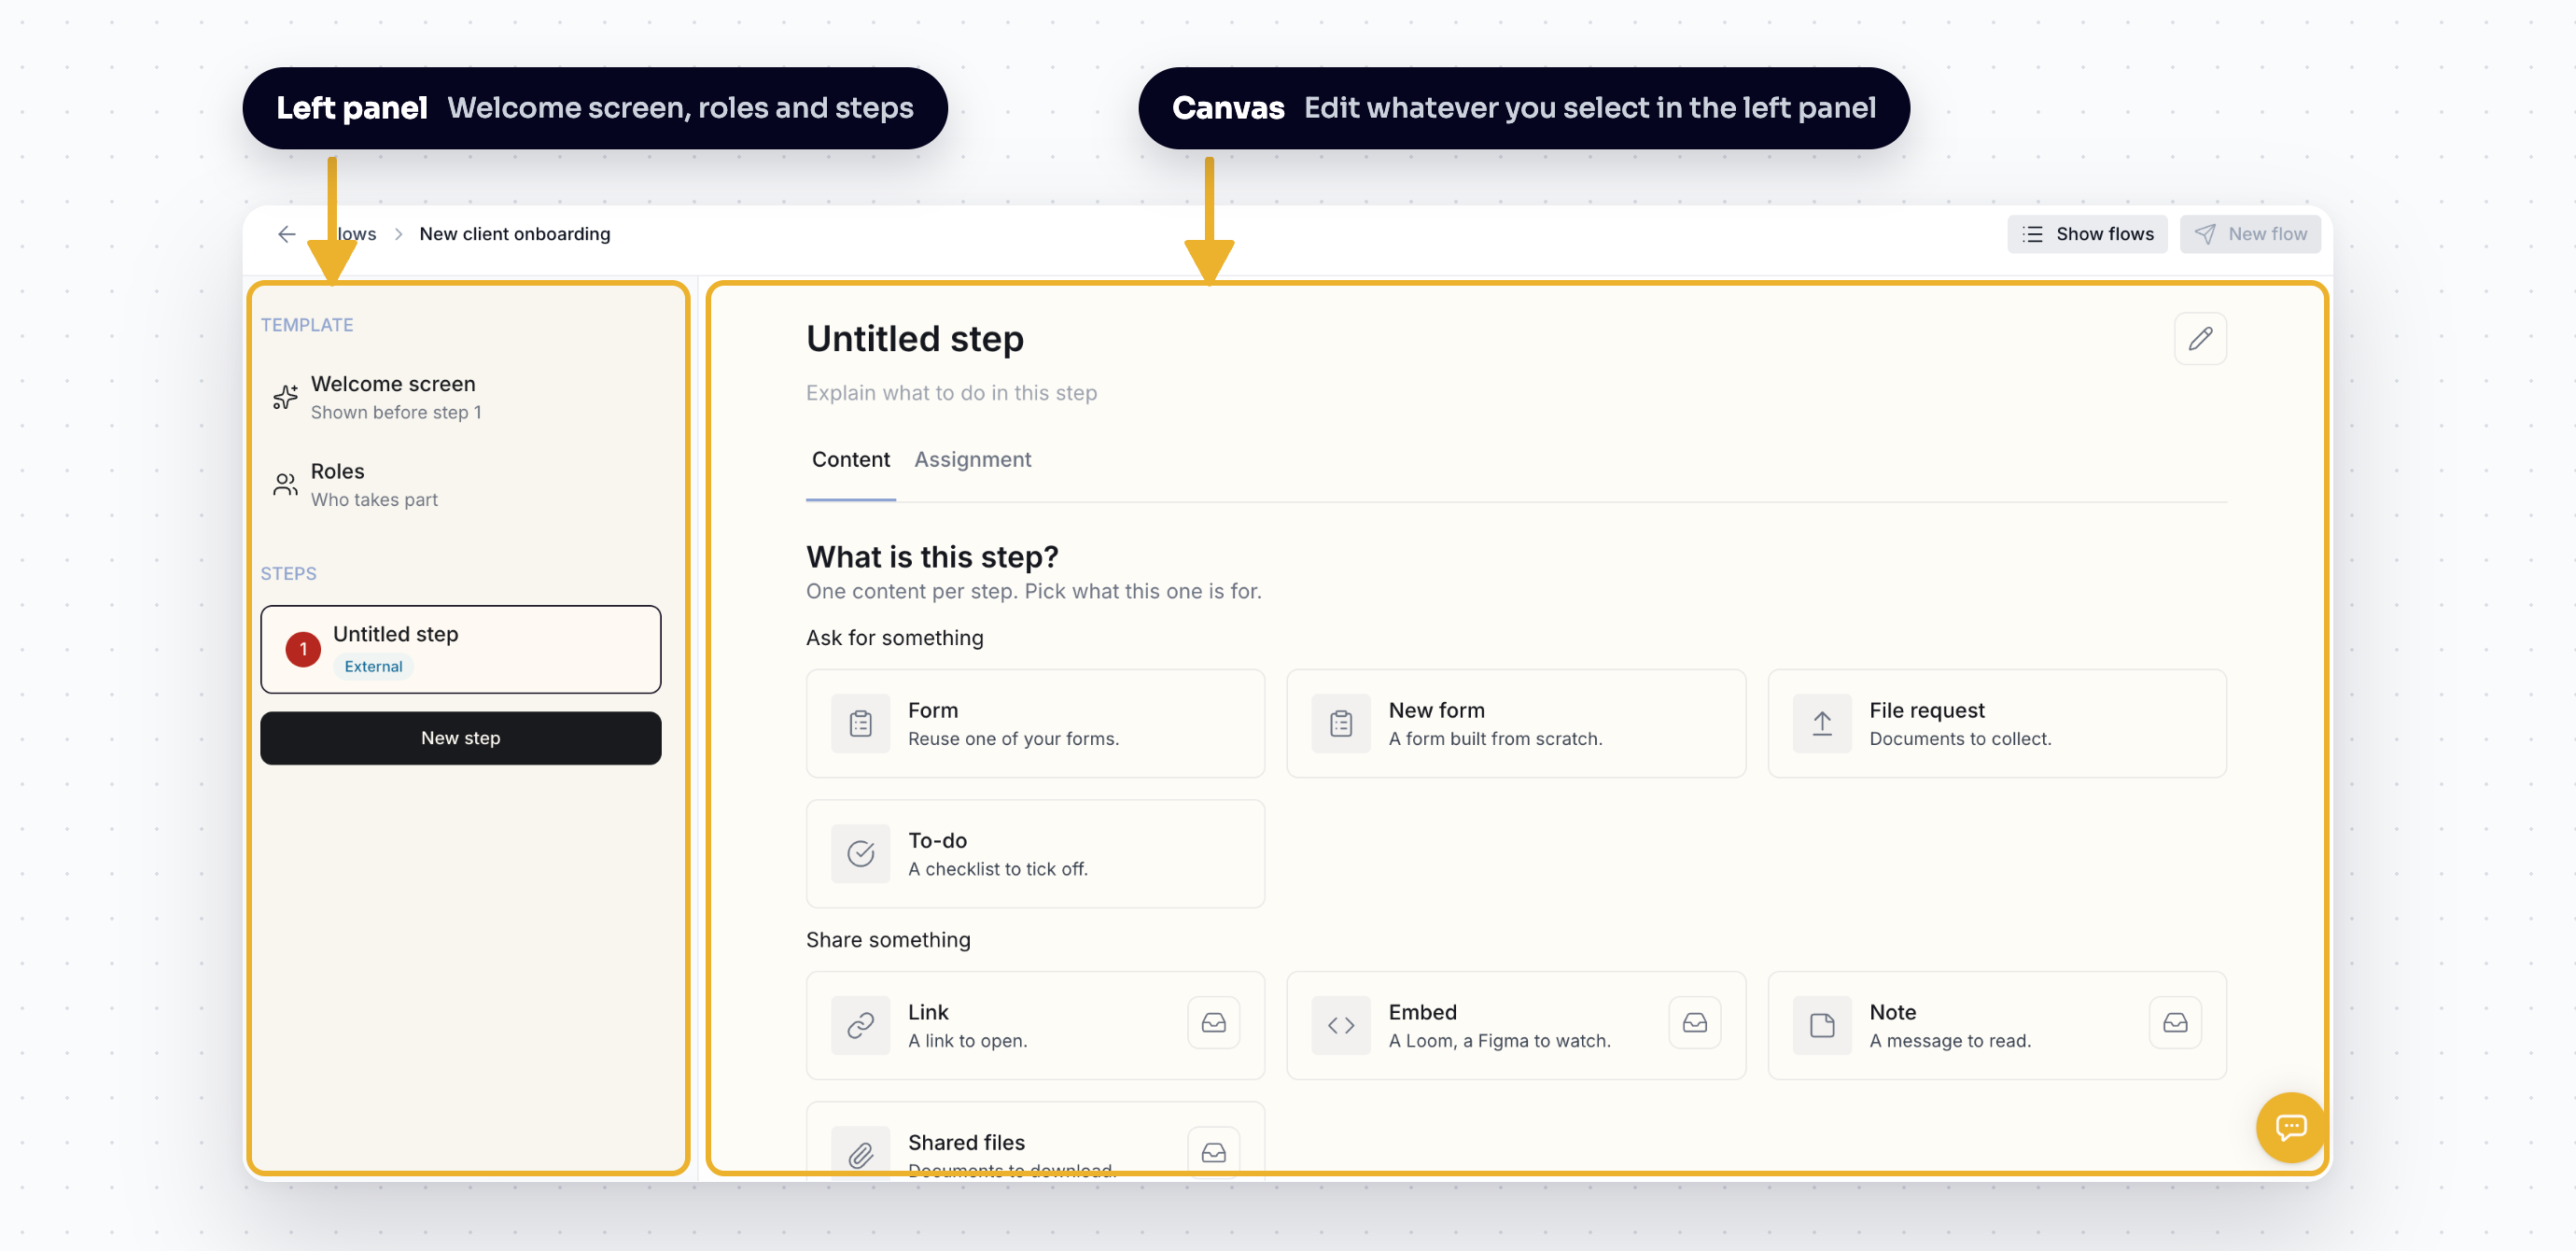
The Welcome Screen is the landing page your client sees when opening their unique link, right before Step 1 begins.
Give your template an internal name, then configure the client view:
Welcome Title: (Default: "Welcome!") The primary header for the page.
Description: A brief message explaining what you need from the client and why.
Button Label: (Default: "Get started") The button your client clicks to begin the sequence.
A role represents a function in the process rather than a specific individual (e.g., Client, Preparer, or Reviewer). You will assign specific people to these roles when you launch an active Flow.
External Roles: Played by your clients or external contacts.
Internal Roles: Played by your team members.
Managing roles:
Click Roles in the left panel, then select New role.
Every step in your template must be assigned to a role.
New templates automatically include one external role and one internal role to get you started.

Steps are the sequential actions your client or team must complete. A template can hold up to 200 steps.
Click New step, then the pencil icon ✏ to set:
Step Title: The main header for the step.
Description: Quick instructions explaining what to do in this step.
Button Label: (Default: "Continue") The button that completes or submits the step.
Step content
Select what action this step holds.
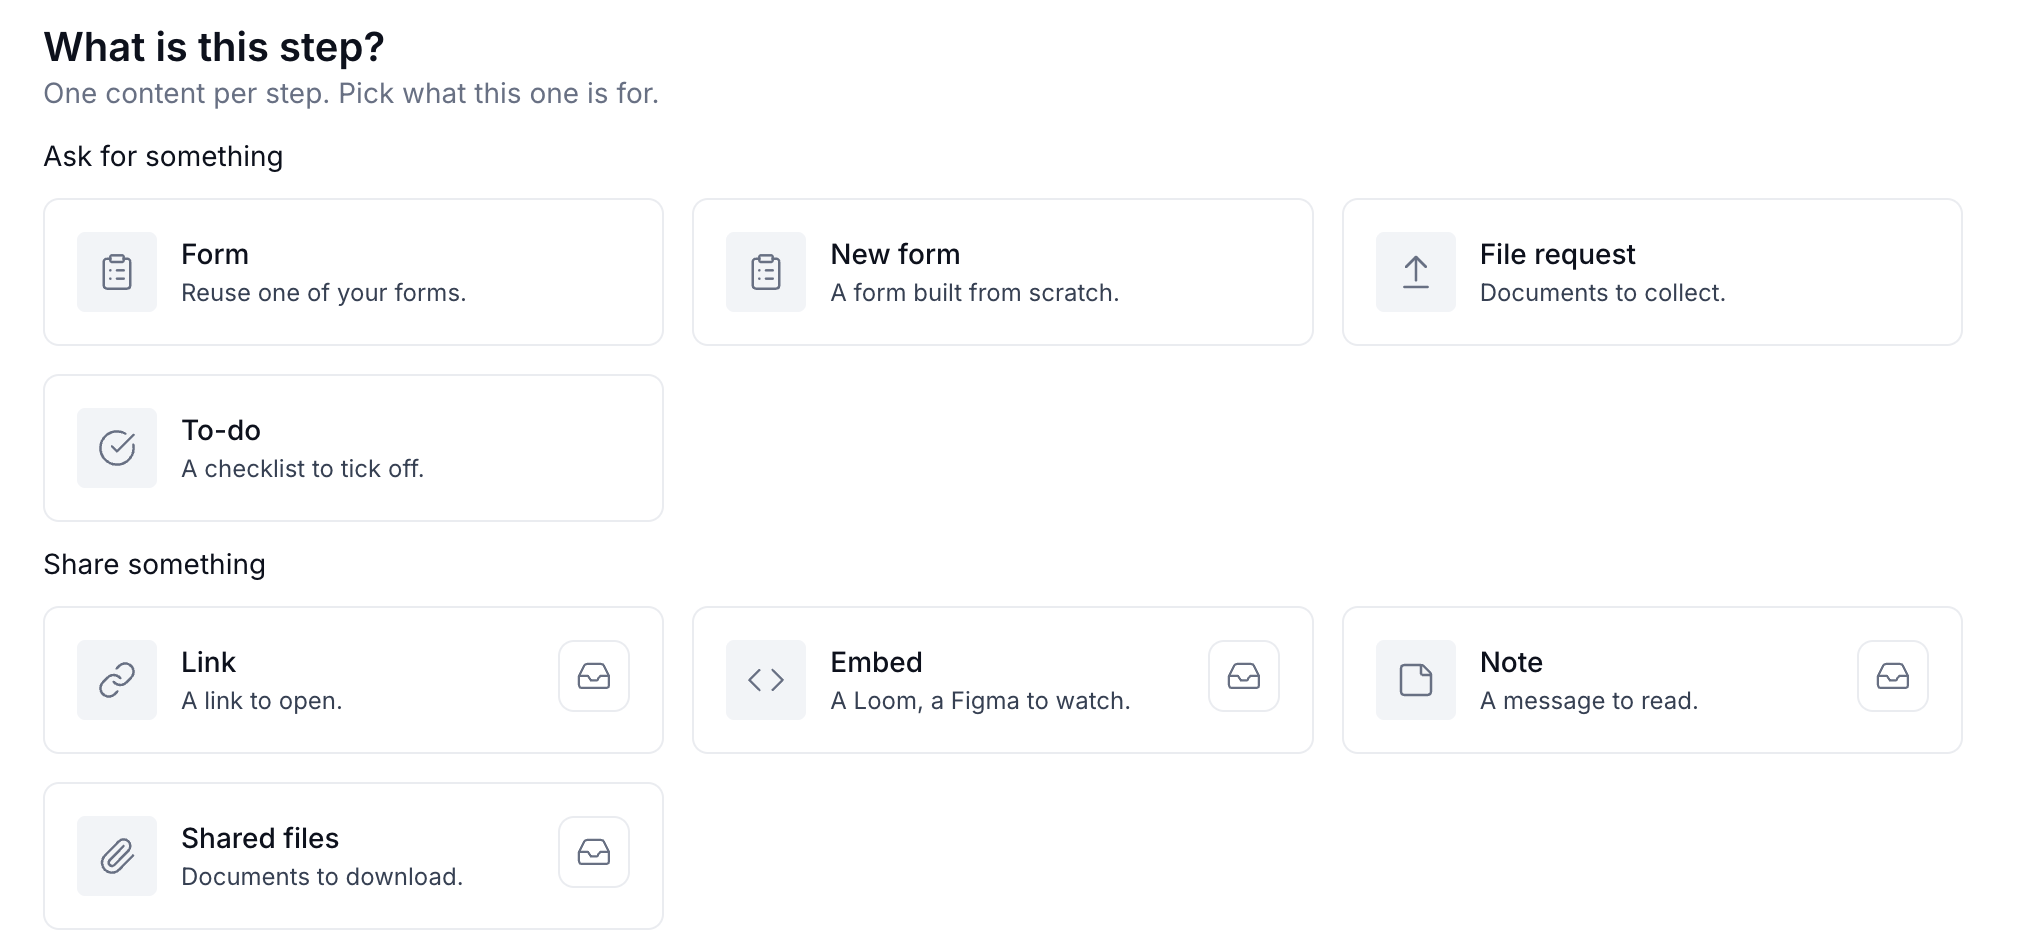
Step content types
Category | Type | Description |
|---|---|---|
Ask for something | Form | Select an existing form or click New form to build one from scratch. (Note: Forms can only be assigned to external roles). |
File Request | Request specific documents for the client to upload. | |
To-do | Create a checklist. Every item must be checked off to complete the step. | |
Share something | Link / Embed / Note | Provide a web link, embedded media, or written text to view or read. |
Shared Files | Provide documents for your client to download. |
Organizing & Managing Steps
Change Content: Click Change step type 🔄 on the content card to clear the current content and choose a new type.
Reorder: Click and drag step cards in the left panel to change their sequence.
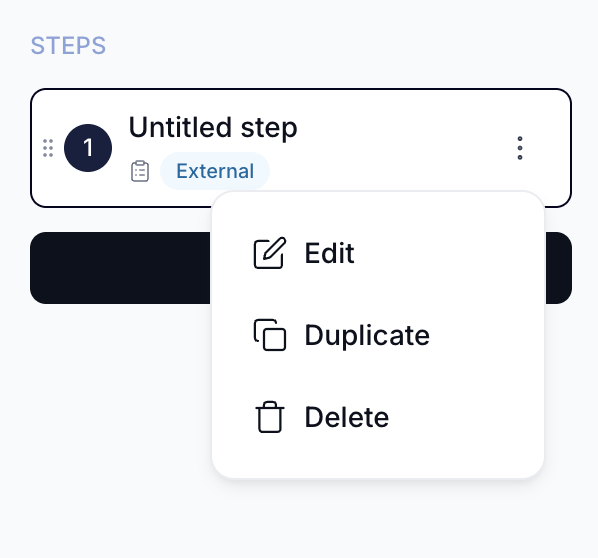
Duplicate or Delete: Click the three dots (...) menu on any step card to duplicate or delete it.
Open the Assignment tab on any step to configure how it behaves:
Who acts on this step: Assign the step to one of your defined roles.
Completion & Approval Rules:
Client completes: The step finishes as soon as the client submits it.
Client completes & team approves: Select this option if your team needs to review and verify uploaded documents or form answers before the Flow advances to the next step.
Internal Steps: For steps assigned to an internal role, the step is either completed by the assigned team member or manually approved by a team member.
Deadlines: Set a due date based on a number of days after the step opens. The assigned user will see the due date on their screen, receive an automated reminder on the due date, and receive a follow-up reminder 3 days later if the step remains open.
Click New Flow at the top right of the builder to start a live Flow immediately from your template.
In your Templates, click the three dots (...) menu next to any template to:
Edit: Modify the template structure.
Duplicate: Make a copy of an existing template blueprint.
Archive: Hide unused templates. Archived templates cannot be used to start new Flows, but you can restore them anytime from the Archived templates tab.
💬 Still have questions? Start a chat with us or email [email protected]. We'll be happy to help.