Building an automation manually gives you full control over every step. You can also make changes to steps in any automation, including the ones Studio’s AI assistant built for you.

Remember that an automation has two main components:
What should start the automation (the trigger), for example a client signing up to their portal.
What should happen next (the steps), for example creating three onboarding tasks and sending a welcome email.
Go to Studio > Automations.
Click New Automation, then Set up manually.
The trigger is the event that starts your automation. When you create an automation, a list of triggers opens:
Type in the Search triggers box to find the one you want, for example "signed up" or "proposal." You can also scroll the list, which is grouped by app (Calendly, Dropbox, Gmail, Hubflo, and so on).
Click the trigger to choose it.
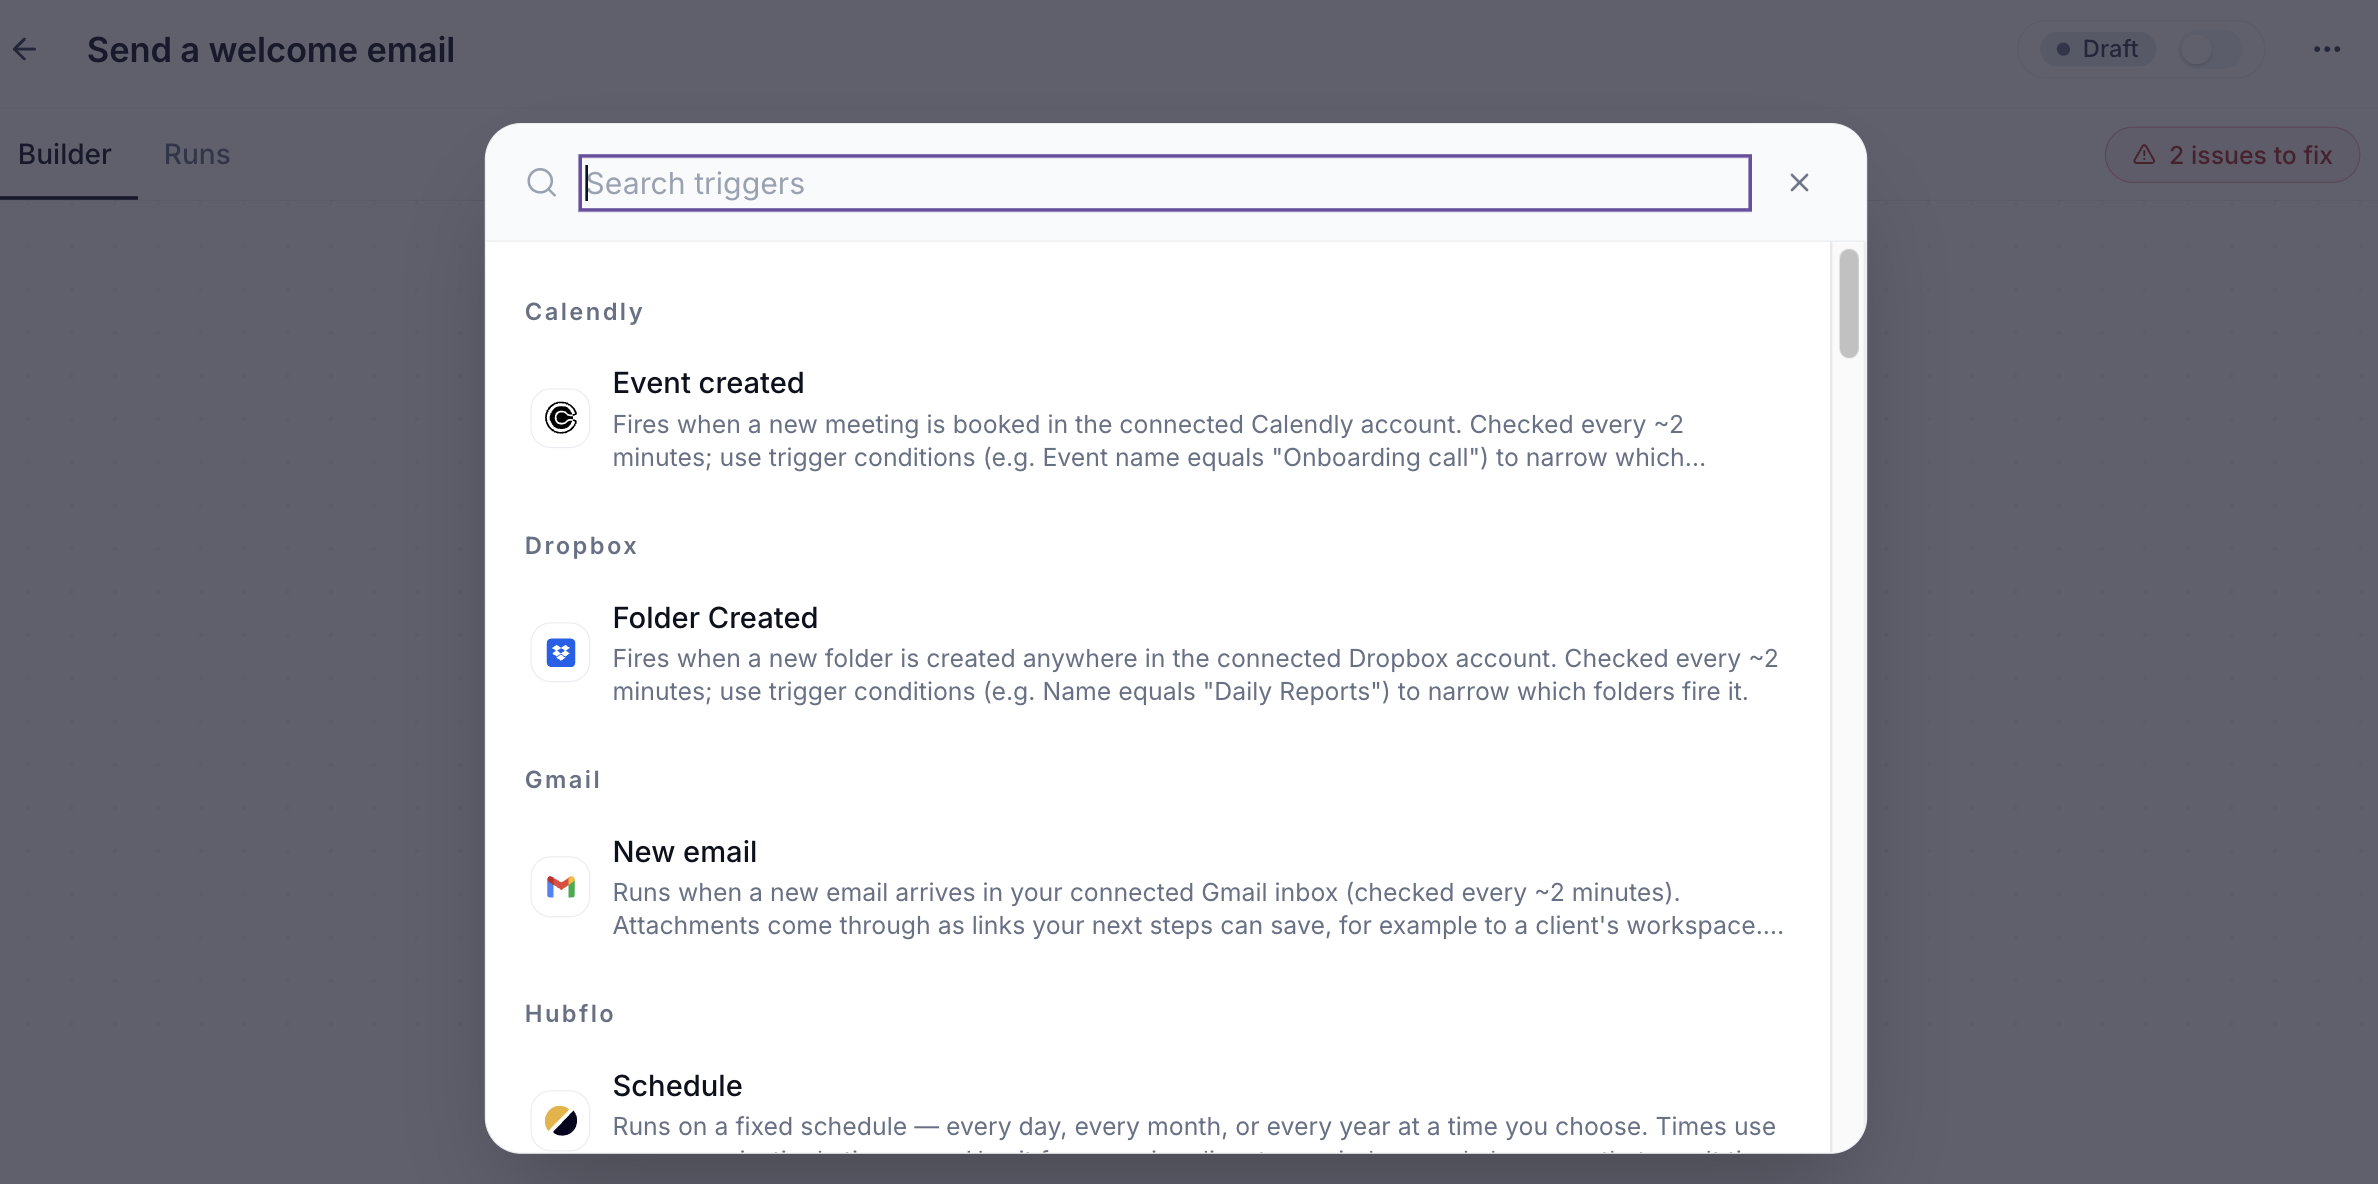
Most triggers start an automation when something happens, like a client signing up. A few work differently:
Schedule: runs the automation on a fixed schedule, every day, month, or year at a time you choose. For example, send your team a summary of overdue tasks every morning, or send a monthly check-in to your clients.
Date Reminder: runs the automation at a set time before a task or project date. For example, remind the client 3 days before a task is due.
Webhook: starts the automation when another app sends data to Hubflo. Use it for apps that aren't on the Integrations page.
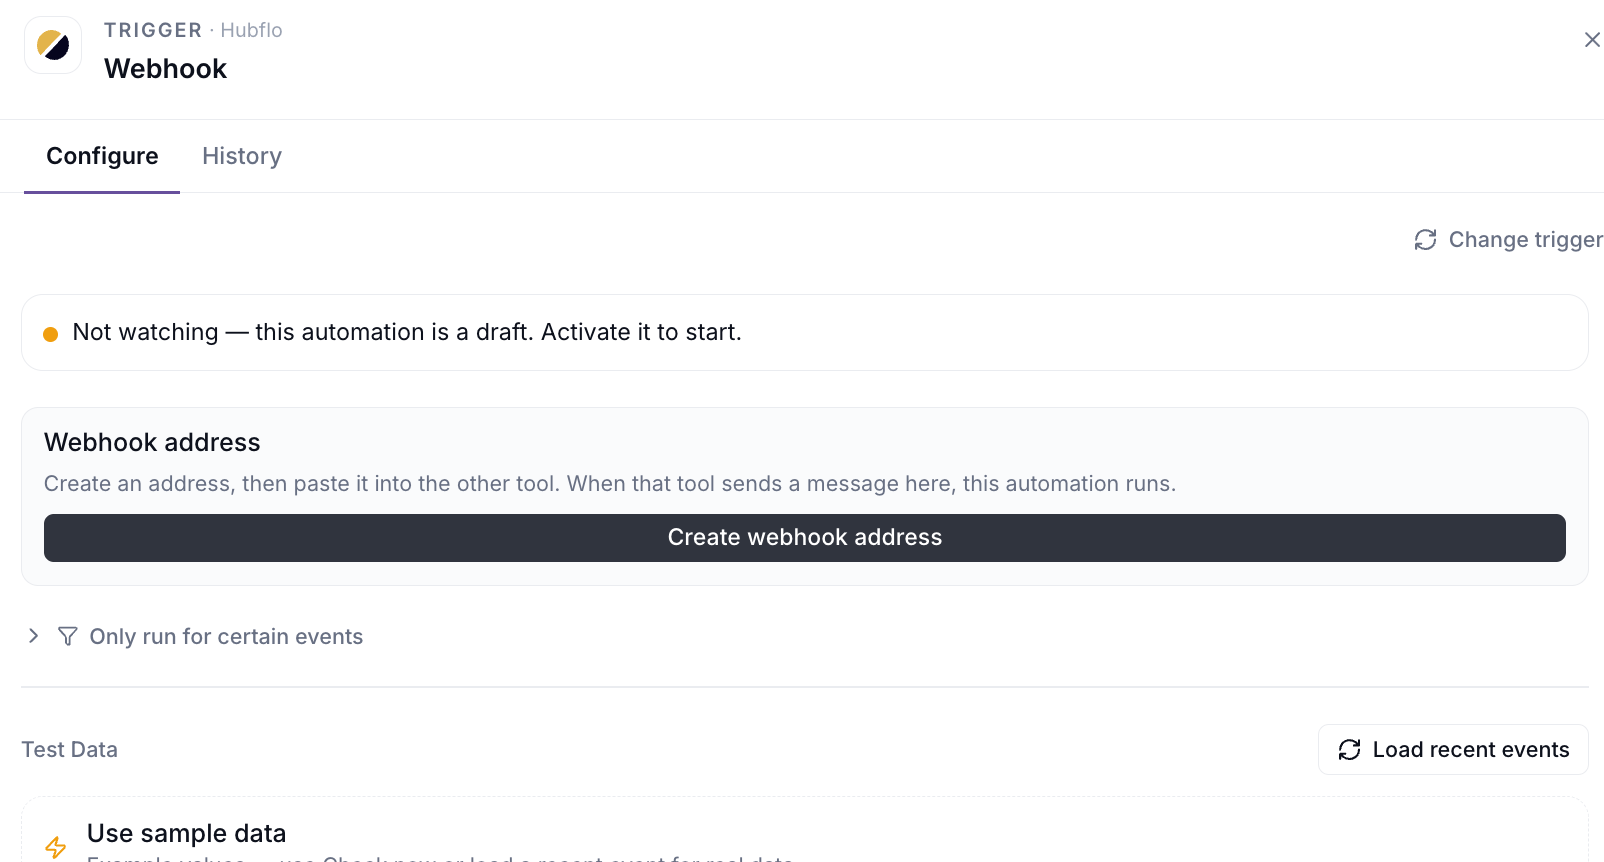
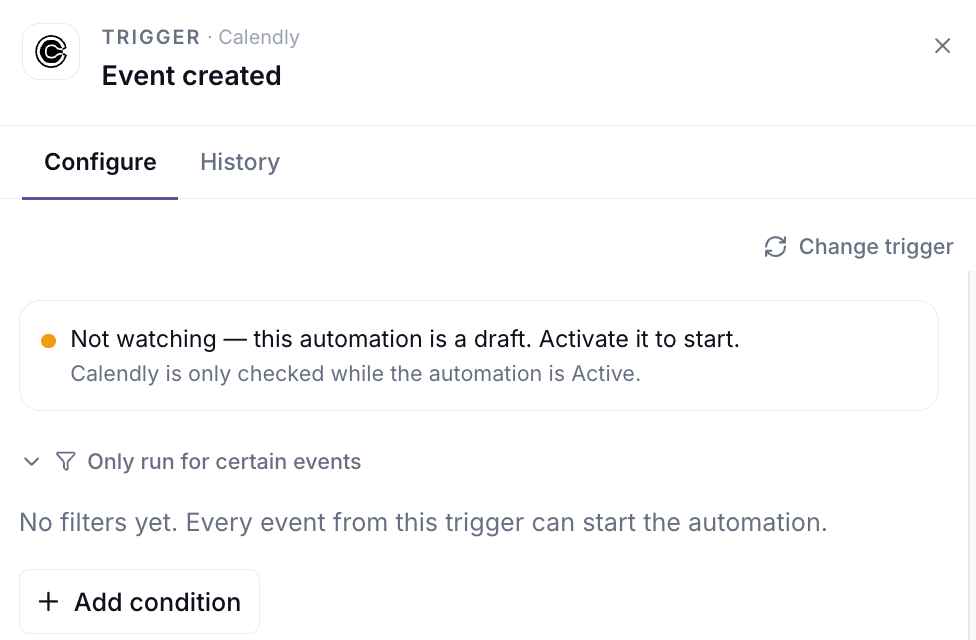
After you choose a trigger, its settings open in two tabs: Configure and History.
In the Configure tab, you can:
Change the trigger: click Change trigger to pick a different one.
Add conditions: click Only run for certain events to narrow which events start the automation. For example, with Calendly's Event created trigger, add the condition Event name equals "Onboarding call" so the automation only runs for onboarding calls, not every meeting.
See sample data: this shows the information the trigger passes to your steps, like the client's name or email. Click Load recent events to use real recent events as sample data, so you can see exactly what information you'll be working with.
The History tab lists every time the trigger has started the automation. It fills in once the automation is active.
Click + under the trigger.
In the Search actions and apps box, type what you want to do, for example "create task." Or browse the categories on the left (see screenshot below).
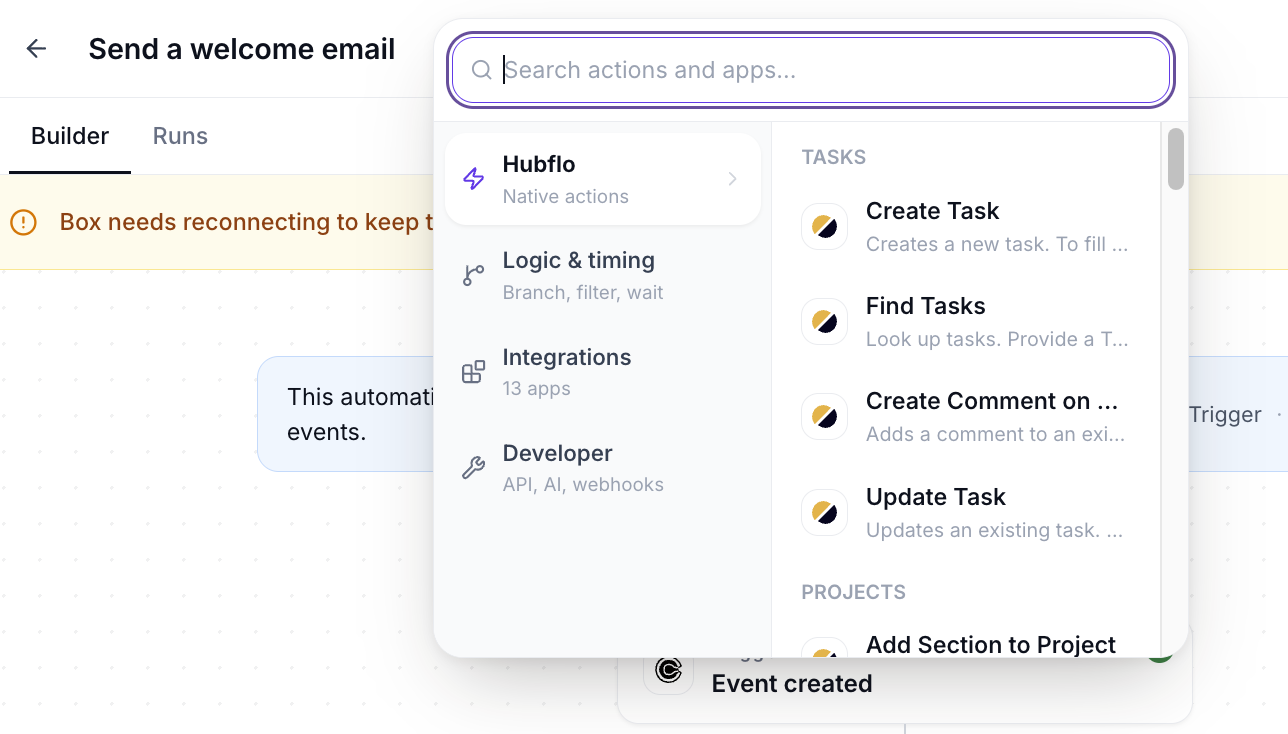
Click the step you want and fill in its fields.
To add another step, click + under the last one. Repeat for each step you need.

When you click +, the steps you can add are grouped into four categories on the left of the menu. Pick a category to browse its steps, or search to find one directly.
Category | What it's for | Examples |
|---|---|---|
Hubflo | Actions in your Hubflo account | Create Task, Find Tasks, Update Task, Create Comment on Task |
Logic & timing | Controlling when and how steps run | Paths, Filter, Wait until, Transform, Delay |
Integrations | Actions in the apps you've connected | Send a Slack message, add a row to Google Sheets |
Developer | Tools for technical users | Make an API request, Send webhook, AI analysis |
Logic and timing steps control when and how your automation runs, so it can make decisions, wait for the right moment, or prepare information for the next step.
Paths: split the automation into branches that run different steps depending on rules you set. For example, send one welcome email to individual clients and another to companies.
Filter: only continue if certain conditions are met. For example, only create a task if a form answer is "Yes." If you add more than one condition, choose All conditions (every condition must match) or Any condition (at least one must match).
Wait until: pause the automation until something happens: a task is completed, a form is submitted, a smartdoc is submitted, or a project reaches a stage. You can also set how long to wait: 90 days by default, up to 365 days. If it doesn't happen in time, the run fails.
Transform: reshape a value so you can use it in later steps. For example, split a client's full name to get their first name for an email greeting.
Delay: pause for a set amount of time. For example, send a follow-up email 3 days after a client signs up. Enter a Duration and choose a Unit, like hours or days.
Developer steps are usually set up by someone technical:
Make an API request: send data to an app that isn't on the Integrations page, or get data from it. See Connect apps to Hubflo Studio.
Send webhook: send data to another tool when the automation reaches this step.
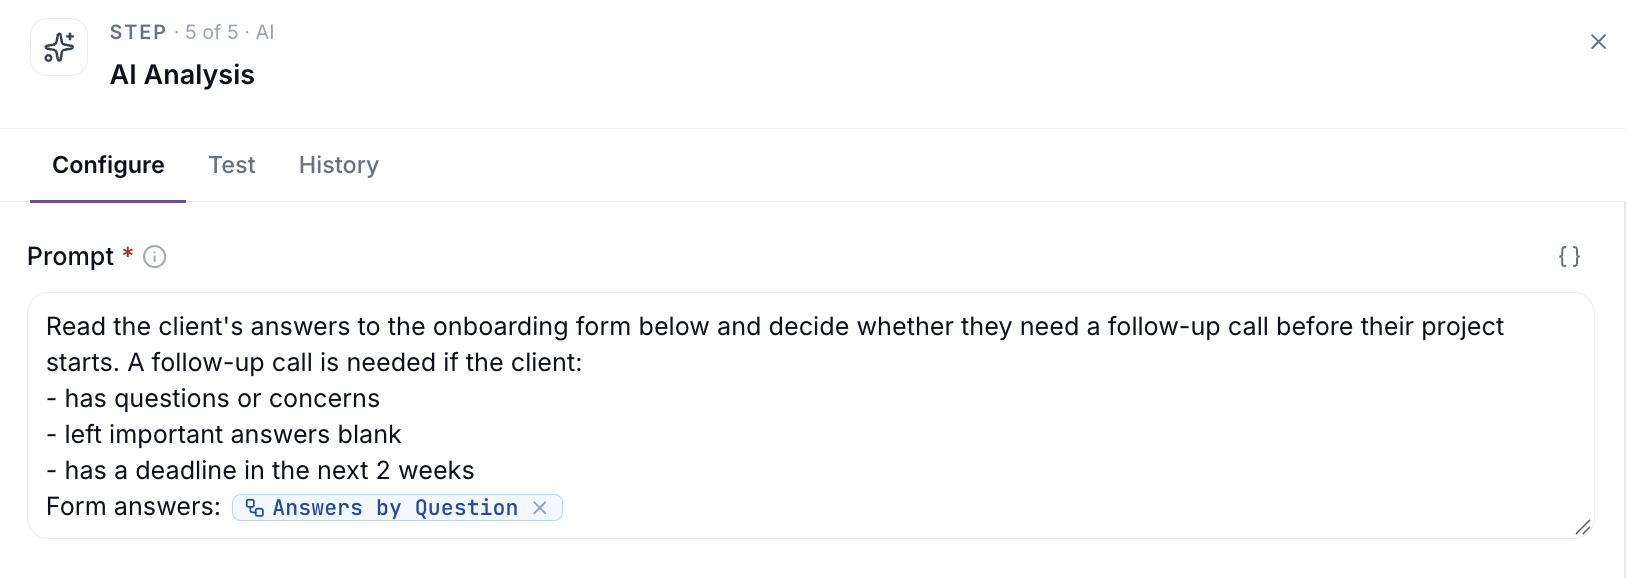
Use AI to read information from earlier steps and return answers your next steps can use. For example, read a client's form answers and decide whether they need a follow-up call. To set it up:
Write a prompt telling the AI what to do. Click { } to insert information from the trigger or earlier steps, like the client's form answers.
Under Output Fields, define what the AI should return. For each field, enter a Field name (like needs_follow_up), choose a Type, describe what the AI should return, and choose whether the field is required.
Click a step to open its settings. Each step has three tabs: Configure, Test, and History.
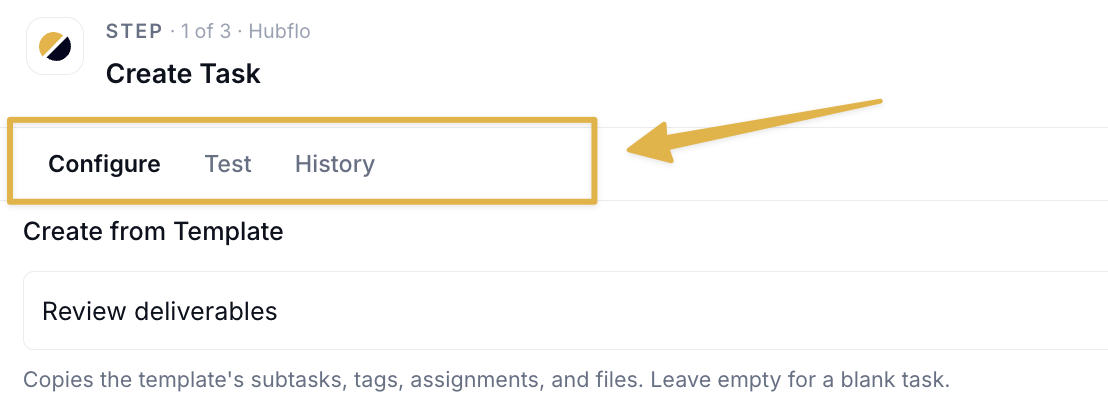
Configure is where you tell the step what to do:
Fill in the fields. Hover over the ⓘ icon next to a field to see what it's for.
To use variables, like the client's email, click { } next to the field. See Use information from earlier steps below.
Click Save when you're done.
Test lets you check one step on its own, before you test the whole automation. Click Run this step. Studio simulates the step using the trigger's sample data and shows you an example of what the step would return. Nothing is created or changed, so you can use it to check that your fields are filled in correctly before you set up the next step.

History lists every time this step has run. It fills in once the automation is active.
Most steps need variables for information that changes each time the automation runs, like the client's name or email. For example, in a step that sends an email, insert the client's email from the trigger. Each time the automation runs, the email goes to the client who just signed up.
You can insert them from the trigger or an earlier step:
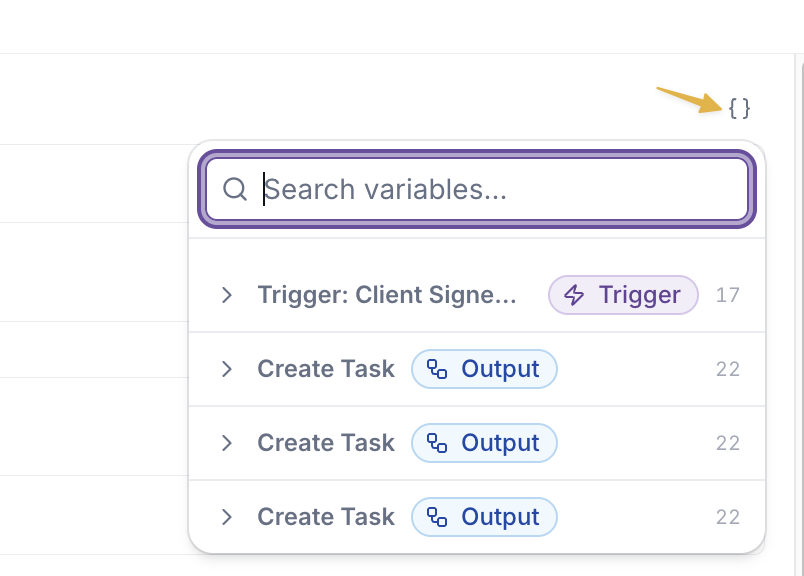
Click { } next to the field.
Choose the information you need. The list is grouped by the trigger and each earlier step. Click one to expand it, or type in Search variables to find what you need.
💬 Still have questions? Start a chat with us or email [email protected]. We'll be happy to help.